Look, I've been setting up AI tooling for years, and OpenClaw is genuinely one of the cleaner installs I've seen — but "clean" doesn't mean "obvious." The first time I ran through it, I got tripped up on PATH issues, spent 20 minutes wondering why my models list was empty, and somehow ended up with a gateway that wasn't properly locked down.
So I went back, ran through the whole thing from scratch, documented every stumbling block, and this is the guide I wish I'd had.
Here's the honest summary upfront: OpenClaw setup takes 10–15 minutes if you have Node.js >=22 and an API key ready. If you're starting completely fresh, budget 25–30 minutes. Either way, by the end of this you'll have a running AI assistant connected to Claude, GPT, or a multi-provider router — and optionally reachable from WhatsApp, Telegram, Discord, Slack, Lark, or iMessage.
Let's get into it.
What Do You Need Before Starting?
Before you run a single command, check these three things:
Node.js >= 22. Run node --version in your terminal. If you get v22.x.x or higher, you're fine. If you get anything lower — or "command not found" — you need to install it first.
# macOS (Homebrew — fastest option if you have it)
brew install node

# macOS or Linux via fnm (version manager, highly recommended)
curl -fsSL https://fnm.vercel.app/install | bash && fnm install 22

# Or just grab the installer from https://nodejs.org
npm ships bundled with Node.js, so that one's handled automatically.
A supported OS. OpenClaw runs on macOS, Linux, and Windows via WSL2. Native Windows (without WSL2) isn't supported.
Quick reality check here — if you're on Windows without WSL2 set up, pause and do that first. The official Microsoft docs on WSL2 installation cover it well and it takes about 10 minutes.
How to Install OpenClaw?
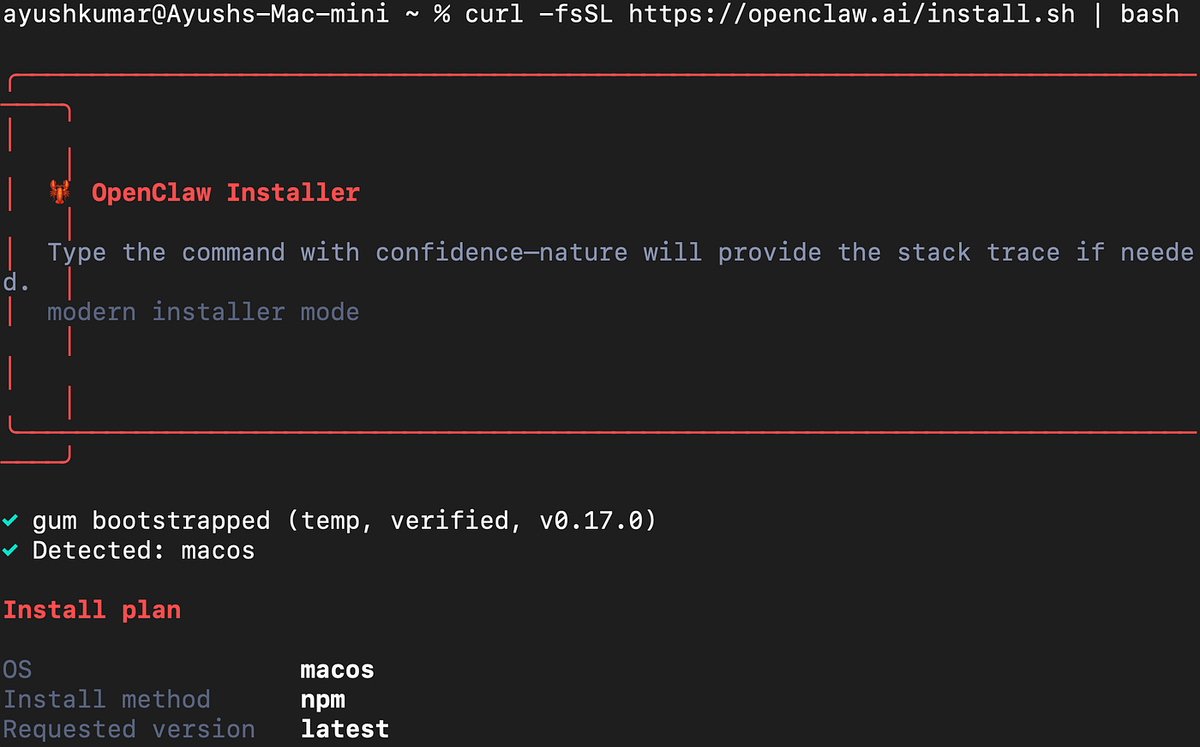
One command:
npm install -g openclaw@latestThen verify it landed:
openclaw --versionIf you get a permission error on the install: try prefixing with sudo. This is a macOS/Linux thing where npm's global directory needs elevated access.
If openclaw isn't found after install (this caught me): npm puts global binaries somewhere that might not be in your PATH. Fix it like this:
export PATH="$(npm config get prefix)/bin:$PATH"Add that line to your ~/.zshrc or ~/.bashrc to make it permanent.
Which AI Provider Should You Choose?
OpenClaw supports multiple AI providers. Here's the practical breakdown:
| Provider | Best For | API Key Format | Cost Model |
|---|---|---|---|
| Anthropic | Claude models — best general reasoning (recommended) | sk-ant-... | Pay-per-use |
| OpenAI | GPT models — strong coding & instruction following | sk-... | Pay-per-use |
| OpenRouter | Access to Claude, GPT, Gemini + 100+ models with one key | sk-or-... | Pay-per-use |
My honest recommendation: start with Anthropic if you're going to use this primarily for development work. Claude Sonnet 4.6 hits a really good balance of capability and cost for the kind of tasks OpenClaw is built for — long-context reasoning, multi-step coding, code review.
OpenRouter is worth considering if you want flexibility to switch models without managing multiple API keys. The tradeoff is a thin routing layer between you and the provider.
How to Get Your API Key Step-by-Step?
An API key is essentially a password that lets OpenClaw authenticate your requests to the AI provider. Each provider has their own dashboard. Here's exactly how to get yours.
Anthropic (Claude)
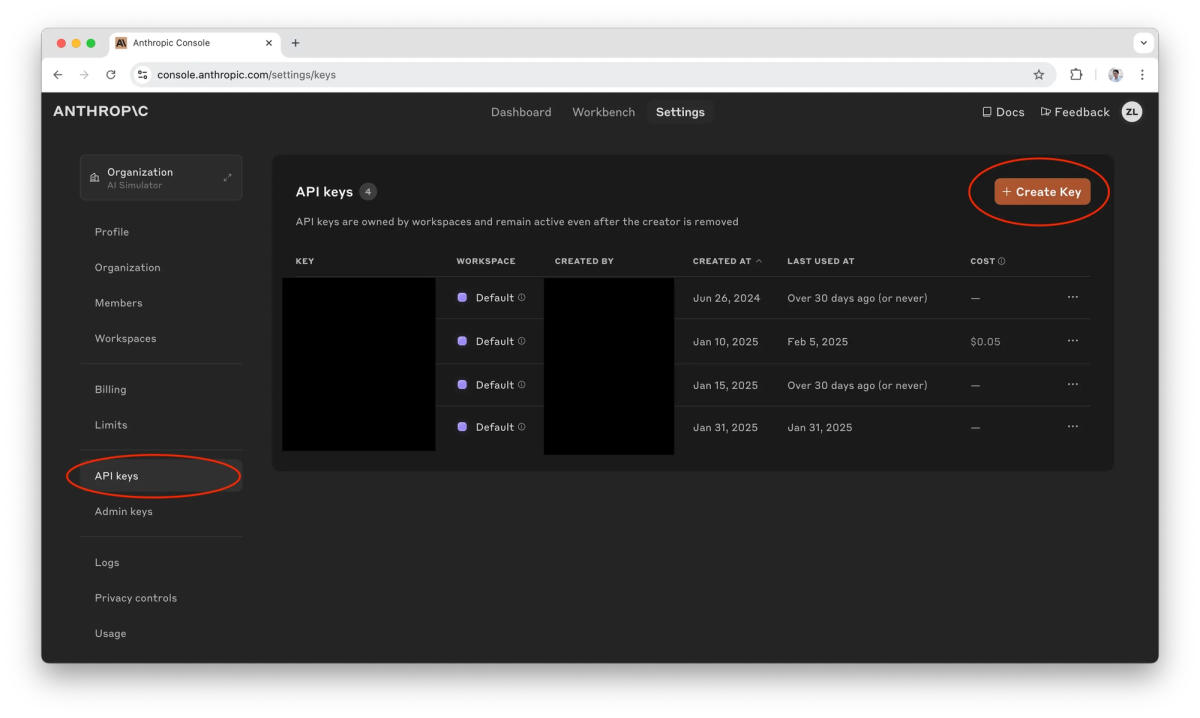
- Go to console.anthropic.com and create an account or log in
- Navigate to Settings → API Keys (direct link: console.anthropic.com/settings/keys)
- Click Create Key, give it a name like "openclaw"
- Copy the key immediately — it starts with
sk-ant-and you won't be able to see it again - New accounts need to add a payment method under Billing before the key will actually work
OpenAI (GPT)
- Go to platform.openai.com/api-keys
- Click Create new secret key, name it "openclaw"
- Copy it immediately (starts with
sk-) — same deal, shown once only - If you haven't added billing yet: platform.openai.com/settings/organization/billing
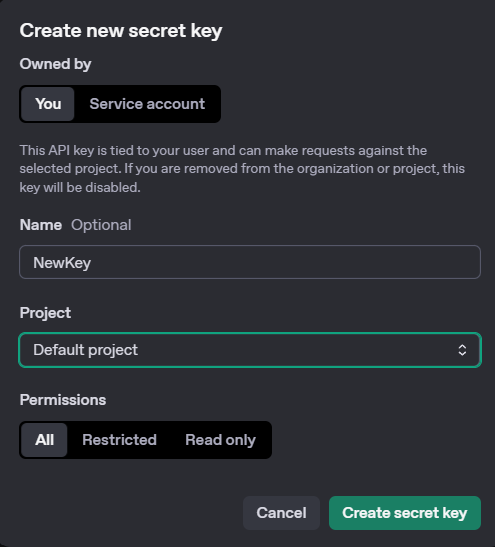
OpenRouter (Multi-Provider)
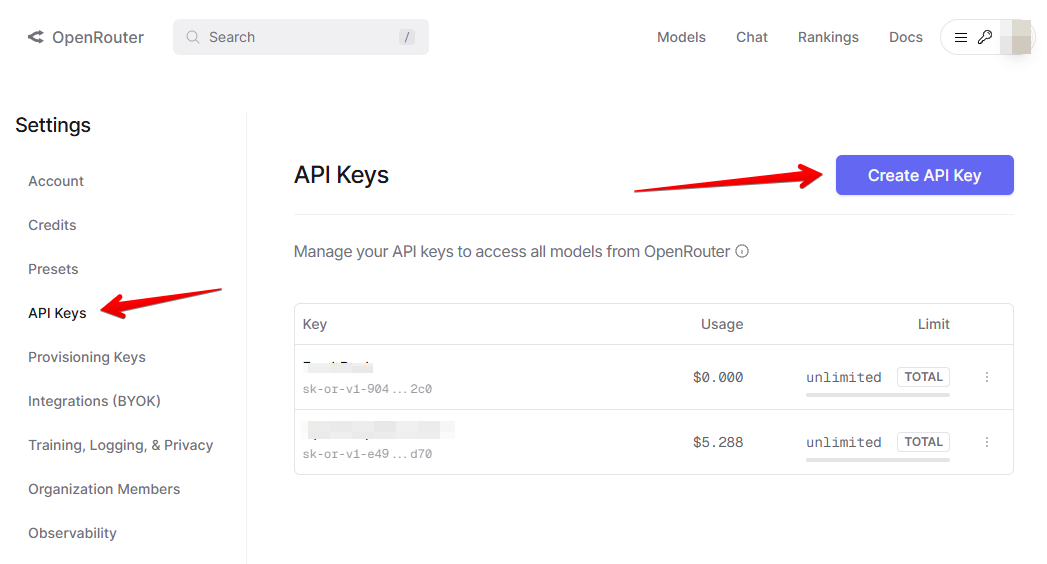
- Go to openrouter.ai/keys
- Click Create Key, name it "openclaw"
- Copy the key (starts with
sk-or-) - Add credits at openrouter.ai/credits if needed
Don't have a key yet? That's fine — you can skip the key during onboarding and add it manually to ~/.openclaw/openclaw.json later. Jump to the Full Configuration Reference section for the format.How to Run the Initial Setup?
OpenClaw's onboard command does all the heavy lifting. Replace the placeholder with your actual key.
If you're using Anthropic:
openclaw onboard --install-daemon --anthropic-api-key "sk-ant-your-key-here"If you're using OpenAI:
openclaw onboard --install-daemon --openai-api-key "sk-your-key-here"If you're using OpenRouter:
openclaw onboard --install-daemon --auth-choice apiKey --token-provider openrouter --token "sk-or-your-key-here"This single command does four things:
- Configures authentication with your chosen provider
- Sets up the local gateway on port 18789
- Installs and starts the background daemon
- Runs a health check to confirm everything's live
If the non-interactive command fails (this happens sometimes with certain shell configurations): run openclaw onboard --install-daemon without the key flags and follow the interactive prompts instead. Select your provider, paste your key when asked, and accept defaults for everything else.
How to Choose Your Default Model?
Your default model is what OpenClaw reaches for on new conversations. Set it by editing ~/.openclaw/openclaw.json.
Anthropic Models
{
  "agents": {
    "defaults": {
      "model": { "primary": "anthropic/claude-sonnet-4-6" }
    }
  }
}| Model | Config ID | When to Use |
|---|---|---|
| Claude Sonnet 4.6 | anthropic/claude-sonnet-4-6 | Best balance of speed, cost, capability — start here |
| Claude Opus 4.6 | anthropic/claude-opus-4-6 | Heavy reasoning tasks where you need the best output |
| Claude Haiku 4.5 | anthropic/claude-haiku-4-5-20251001 | Fast responses, low cost — good for simple queries |
Version note: Model IDs can change when providers release updates. If a model ID stops working, check the Anthropic models documentation for the current list.
OpenAI Models
{
  "agents": {
    "defaults": {
      "model": { "primary": "openai/gpt-5.2" }
    }
  }
}| Model | Config ID | Notes |
|---|---|---|
| GPT-5.2 | openai/gpt-5.2 | Recommended default |
| GPT-5.2 mini | openai/gpt-5.2-mini | Faster and cheaper |
| o3 | openai/o3 | Strong multi-step reasoning |
OpenRouter Models
OpenRouter uses the format openrouter/<provider>/<model>:
{
  "agents": {
    "defaults": {
      "model": { "primary": "openrouter/anthropic/claude-sonnet-4-6" }
    }
  }
}| Model | Config ID |
|---|---|
| Claude Sonnet 4.6 | openrouter/anthropic/claude-sonnet-4-6 |
| Claude Opus 4.6 | openrouter/anthropic/claude-opus-4-6 |
| GPT-5.2 | openrouter/openai/gpt-5.2 |
| Gemini 2.5 Pro | openrouter/google/gemini-2.5-pro |
What Recommended Settings Should You Add?
These aren't defaults — you need to add them manually. But they make a real difference in day-to-day use.
{
  "agents": {
    "defaults": {
      "compaction": { "mode": "safeguard" },
      "maxConcurrent": 4,
      "subagents": { "maxConcurrent": 8 }
    }
  },
  "messages": { "ackReactionScope": "group-mentions" },
  "commands": { "native": "auto", "nativeSkills": "auto" },
  "skills": { "install": { "nodeManager": "npm" } }
}
What these actually do:
compaction: safeguard— prevents the agent from losing context when conversations get long. Without this, you can hit silent failures on complex tasks.maxConcurrent: 4— limits how many tasks run at once. Bump this up if you're doing heavy parallel work; lower it if you're on a constrained machine.ackReactionScope: group-mentions— in group chats, the bot only reacts to messages that mention it. Prevents noise in shared channels.
How to Secure Your OpenClaw Installation?
This is the section most people skip. Don't.
The onboard wizard should have set these already, but verify your ~/.openclaw/openclaw.json has:
{
  "gateway": {
    "mode": "local",
    "bind": "loopback",
    "auth": { "mode": "token" },
    "nodes": {
      "denyCommands": [
        "camera.snap", "camera.clip", "screen.record",
        "calendar.add", "contacts.add", "reminders.add"
      ]
    }
  }
}
Three non-negotiable rules:
- Always bind to loopback.
"bind": "loopback"means the gateway only listens on127.0.0.1— your own machine. If this gets set to0.0.0.0, your gateway is exposed to your entire network. Don't do that. - Keep token auth on. The gateway auth token is essentially a password.
"auth": { "mode": "token" }ensures every request has to authenticate. Turning this off means anything on your machine can talk to your AI agent. - Use the denyCommands list. This is where you explicitly block the agent from accessing your camera, calendar, and contacts without manual permission. The list above is a solid starting baseline — add anything else you're not comfortable with the agent touching.
Quick reality check here: the security model is "local by default, explicit opt-in for everything sensitive." That's a reasonable design. Just make sure the defaults are actually in place.
How to Connect Messaging Apps? (Optional)
You can use OpenClaw entirely through the terminal (openclaw tui) and that's genuinely great for most development workflows. But connecting a messaging app means you can interact with your AI assistant from your phone, which is occasionally very useful.
Here's each channel setup — start with the one you actually use.
How to Connect WhatsApp?
WhatsApp pairs via QR code scan, same as WhatsApp Web.
Step 1 — Add config:
{
  "channels": {
    "whatsapp": {
      "enabled": true,
      "dmPolicy": "pairing",
      "allowFrom": ["+your-phone-number"],
      "groupPolicy": "allowlist",
      "groupAllowFrom": ["+your-phone-number"]
    }
  }
}
Replace +your-phone-number with your number in international format (e.g. +12125551234).
Step 2 — Link your phone:
openclaw daemon restart
openclaw channels login --channel whatsapp
Step 3 — Scan the QR code in WhatsApp: Settings → Linked Devices → Link a Device.
Step 4 — Approve the pairing:
openclaw pairing list whatsapp
openclaw pairing approve whatsapp <CODE>
Best practice: use a dedicated WhatsApp number, not your personal one. The connection works via the same multi-device protocol as WhatsApp Web — it's a linked device session.
How to Connect Telegram?
This one's the fastest. You just need a bot token from BotFather.
Step 1 — Create the bot:
- Open Telegram and message @BotFather
- Send
/newbotand follow the prompts - Copy the token BotFather gives you
Step 2 — Add config:
{
  "channels": {
    "telegram": {
      "enabled": true,
      "botToken": "your-bot-token-here",
      "dmPolicy": "pairing"
    }
  }
}
Step 3 — Restart and approve:
openclaw daemon restartSend any message to your bot in Telegram, then:
openclaw pairing list telegram
openclaw pairing approve telegram <CODE>
Done. Genuinely the simplest channel to get running.
How to Connect Discord?
Discord requires creating a bot application in their developer portal.
Step 1: Go to discord.com/developers/applications and click New Application.
Step 2: In the sidebar, click Bot → Reset Token → copy the token.
Step 3: On the Bot page, scroll down and enable Message Content Intent.
Step 4: Go to OAuth2 → URL Generator. Check the bot scope, then check these permissions: Send Messages, Read Message History, Add Reactions, Attach Files, Embed Links.
Step 5: Copy the generated URL, open it in a browser, and add the bot to your server.
Step 6 — Add config:
{
  "channels": {
    "discord": {
      "enabled": true,
      "botToken": "your-bot-token-here",
      "dmPolicy": "pairing"
    }
  }
}
Step 7 — Restart and verify:
openclaw daemon restart
openclaw channels status --probe
Pro tip: create a private Discord server with dedicated channels per context — e.g.,#coding,#research. Keeps different AI sessions cleanly separated.
How to Connect Slack?
Slack needs both a bot token and an app token (for socket mode).
Step 1: Go to api.slack.com/apps → Create New App → From scratch.
Step 2: Under Socket Mode, enable it, then click to generate an App Token (starts with xapp-). Copy it.
Step 3: Under OAuth & Permissions, add these bot scopes: chat:write, channels:history, im:history, app_mention.
Step 4: Click Install to Workspace and authorize.
Step 5: Copy the Bot User OAuth Token (starts with xoxb-).
Step 6: Under Event Subscriptions, enable events and subscribe to: message.im, app_mention.
Step 7 — Add config:
{
  "channels": {
    "slack": {
      "enabled": true,
      "botToken": "xoxb-your-bot-token",
      "appToken": "xapp-your-app-token",
      "dmPolicy": "pairing"
    }
  }
}
Step 8 — Restart:
openclaw daemon restart
openclaw channels status --probe
How to Connect Lark / Feishu?
Step 1: Go to the developer console:
- Lark: open.larksuite.com
- Feishu: open.feishu.cn
Step 2: Create a Custom App and go to the Credentials page. Copy the App ID (starts with cli_) and App Secret.
Step 3 — Add config:
{
  "channels": {
    "feishu": {
      "enabled": true,
      "domain": "lark",
      "accounts": {
        "main": {
          "appId": "cli_your-app-id",
          "appSecret": "your-app-secret"
        }
      }
    }
  }
}
For Feishu specifically (vs. the international Lark version), change "domain" to "feishu".
Step 4 — Restart:
openclaw daemon restart
openclaw channels status --probe
How to Connect iMessage? (macOS Only)
This one requires a helper CLI tool and some macOS privacy permissions. It's the most involved channel setup.
Step 1 — Install the CLI tool:
brew install steipete/tap/imsgStep 2 — Grant permissions:
- Open System Settings → Privacy & Security → Full Disk Access
- Enable it for your Terminal application
- When prompted, allow Automation access for Messages
Step 3 — Add config (replace YOUR_USERNAME with your actual macOS username):
{
  "channels": {
    "imessage": {
      "enabled": true,
      "cliPath": "/usr/local/bin/imsg",
      "dbPath": "/Users/YOUR_USERNAME/Library/Messages/chat.db"
    }
  }
}
Step 4 — Restart:
openclaw daemon restartWhat Are the Channel Access Control Options?
All channels share the same access control system. Here's what each setting does:
| Option | Values | Description |
|---|---|---|
| dmPolicy | pairing (default), allowlist, open, disabled | Who can DM the bot directly |
| groupPolicy | allowlist, mention, open, disabled | How the bot behaves in group chats |
| allowFrom | Array of identifiers | Explicit whitelist of senders |
For personal use, pairing is the right default — it means the bot requires an approval before accepting messages from a new contact.
If you're running this on a shared server and want to lock it down further, use allowlist with an explicit allowFrom array containing only the identifiers you trust.
How to Verify Everything Works?
Once you've finished setup, do a quick sanity check:
openclaw daemon restart
sleep 3
openclaw models list
You should see your provider's models listed — something like anthropic/claude-sonnet-4-6. If the list is empty, that almost always means the API key is wrong. Go back to your provider console and verify the key is valid and billing is set up.
Check connected channels:
openclaw channels status --probeThis probes each enabled channel and tells you whether the connection is live.
How to Start Using OpenClaw?
Terminal Chat
openclaw tuiThis opens an interactive terminal interface. Clean, fast, works well for development workflows where you're already in a terminal.
Web Dashboard
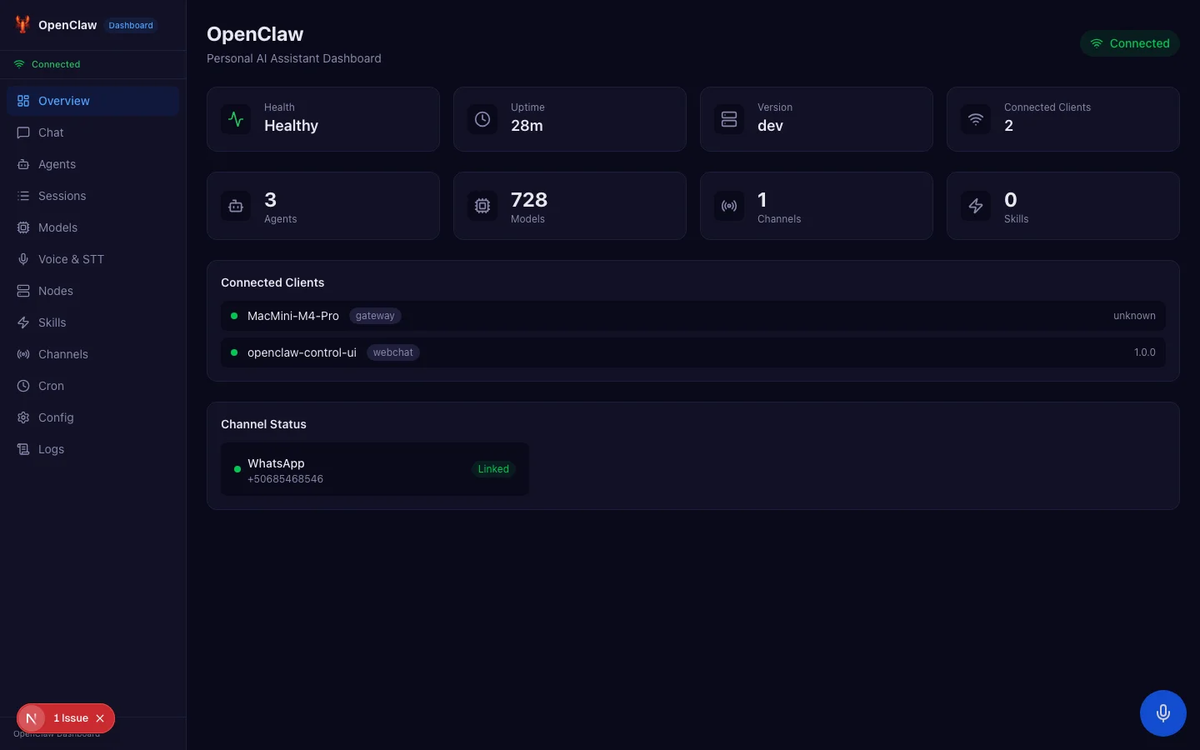
openclaw dashboardThen open http://127.0.0.1:18789 in your browser. Better for longer conversations or when you want a more visual interface.
Useful Commands
| Command | What It Does |
|---|---|
| openclaw tui | Open terminal chat |
| openclaw dashboard | Open web dashboard |
| openclaw daemon status | Check if daemon is running |
| openclaw daemon restart | Restart the daemon |
| openclaw daemon logs | View daemon logs (essential for debugging) |
| openclaw models list | List available models |
| openclaw channels status --probe | Check channel connection status |
Full Configuration Example
Here's a complete ~/.openclaw/openclaw.json showing Anthropic with WhatsApp and Telegram connected — use this as your reference when building your own config:
{
  "env": {
    "ANTHROPIC_API_KEY": "sk-ant-your-key-here"
  },
  "agents": {
    "defaults": {
      "model": { "primary": "anthropic/claude-sonnet-4-6" },
      "compaction": { "mode": "safeguard" },
      "maxConcurrent": 4,
      "subagents": { "maxConcurrent": 8 }
    }
  },
  "channels": {
    "whatsapp": {
      "enabled": true,
      "dmPolicy": "pairing",
      "allowFrom": ["+1234567890"]
    },
    "telegram": {
      "enabled": true,
      "botToken": "123456:ABC-your-bot-token",
      "dmPolicy": "pairing"
    }
  },
  "gateway": {
    "mode": "local",
    "bind": "loopback",
    "auth": { "mode": "token" },
    "nodes": {
      "denyCommands": [
        "camera.snap", "camera.clip", "screen.record",
        "calendar.add", "contacts.add", "reminders.add"
      ]
    }
  },
  "messages": { "ackReactionScope": "group-mentions" },
  "commands": { "native": "auto", "nativeSkills": "auto" },
  "skills": { "install": { "nodeManager": "npm" } }
}
What If Something Goes Wrong?
Here's what I've actually run into (and seen others run into):
| Problem | Most Likely Cause | Fix |
|---|---|---|
| openclaw: command not found after install | npm global bin not in PATH | export PATH="$(npm config get prefix)/bin:$PATH" — add to your shell profile |
| node: command not found | Node.js not installed | macOS: brew install node — or download fromnodejs.org |
| openclaw.json not found | Onboarding never completed | Run openclaw onboard --install-daemon |
| Models list is empty | Invalid or billing-not-set-up API key | Verify in your provider console; run openclaw daemon logs for error details |
| Daemon won't start | Port 18789 already in use, or previous crash | openclaw daemon stop && openclaw daemon start |
| WhatsApp QR code expired | Session timed out during scan | Re-run openclaw channels login --channel whatsapp |
| Channel not connecting | Config error (typo in token, wrong field name) | openclaw channels status --probe + openclaw daemon logs |
Quick debugging workflow: when something doesn't work, openclaw daemon logs is almost always the right first step. It gives you the actual error message rather than the silent failure you see in the status commands.
Quick Reference Links
- OpenClaw Docs: docs.openclaw.ai
- OpenClaw GitHub: github.com/openclaw/openclaw
- Anthropic Console (API Keys): console.anthropic.com
- Anthropic Models Docs: docs.anthropic.com/en/docs/about-claude/models
- OpenAI Platform: platform.openai.com
- OpenRouter: openrouter.ai
- Discord Developer Portal: discord.com/developers/applications
- Slack API: api.slack.com/apps
- Lark Developer: open.larksuite.com
- Feishu Developer: open.feishu.cn
- Node.js (install): nodejs.org
- WSL2 Setup (Windows): Microsoft WSL2 Docs
FAQ: OpenClaw Setup Questions
Q: Do I need to keep my terminal open for OpenClaw to work?
A: No. The --install-daemon flag in the onboard command sets up a background service that runs even when your terminal is closed. That's the whole point of the daemon.
Q: Which AI model should I start with if I'm unsure?
A: Claude Sonnet 4.6 via Anthropic is the safe default. It's the best cost-to-capability ratio for general-purpose tasks. If you find yourself hitting its limits on complex reasoning tasks, step up to Opus 4.6.
Q: Can I use multiple providers at the same time?
A: Yes — add API keys for multiple providers in your config and switch between them by changing the model.primary value. OpenRouter is actually built for this use case if you want a single key that routes across providers.
Q: Is my API key stored securely?
A: It's stored in ~/.openclaw/openclaw.json on your local machine. That file is only readable by your user account (assuming default permissions). Don't commit it to version control — treat it like any other secrets file.
Q: What happens when a model ID changes?
A: OpenClaw will fail to route the request and log an error. When this happens, check the provider's documentation for the current model ID and update your config. This is why I added a note about model IDs being version-sensitive — it's worth bookmarking Anthropic's models page and checking it if things stop working after a provider update.
Q: Can I run OpenClaw on a remote server and access it from anywhere?
A: Technically yes, but don't expose the gateway to the public internet without understanding what you're doing. The security section covers the baseline — if you need remote access, look into SSH tunneling rather than changing the bind address to 0.0.0.0.
Q: The daemon keeps crashing. What should I check?
A: Run openclaw daemon logs and look for the actual error. Common causes: invalid config JSON (missing comma, extra bracket), port 18789 conflict, or an API key that's been revoked.
